How to Configure AI Studio in Acumatica – Step-by-Step Guide
This guide explains how to configure AI Studio in Acumatica to generate content directly inside ERP screens, using Large Language Models (LLMs) such as OpenAI.
The example focuses on generating Stock Item descriptions, but the same approach applies to many other use cases.
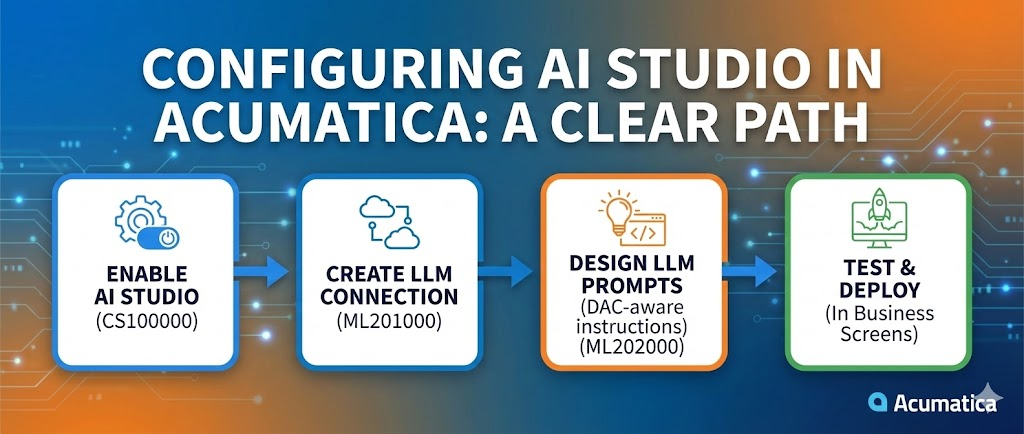
Step 1. How do you enable AI Studio in Acumatica?
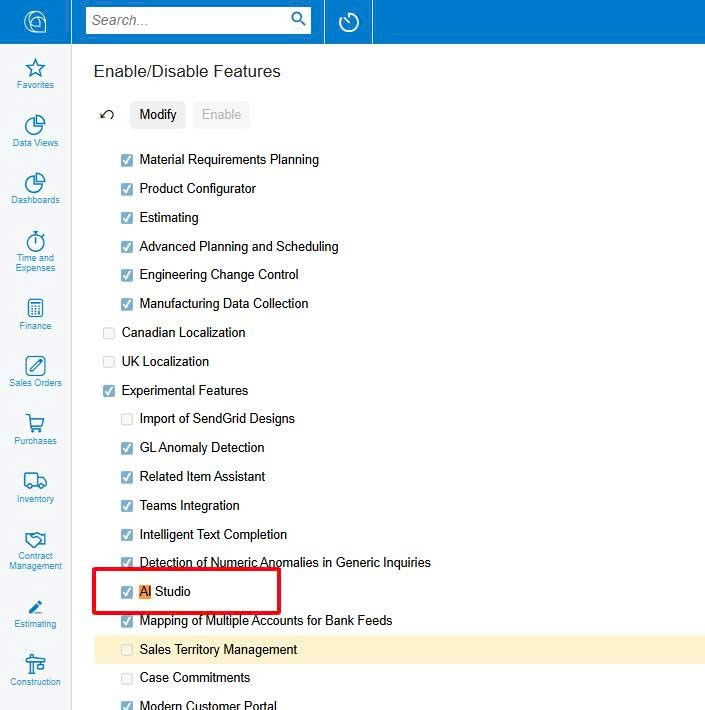
You enable AI Studio by turning on the feature in the Enable/Disable Features screen (CS100000).
Go to System Management – Enable/Disable Features (CS100000).
Click Modify, then check AI Studio.
Save and publish the changes.
Once enabled, Acumatica exposes new screens for LLM Connections and LLM Prompts.
Step 2. How do you create an LLM Connection in Acumatica?
You create an LLM Connection in screen ML201000 to connect Acumatica with an AI provider.
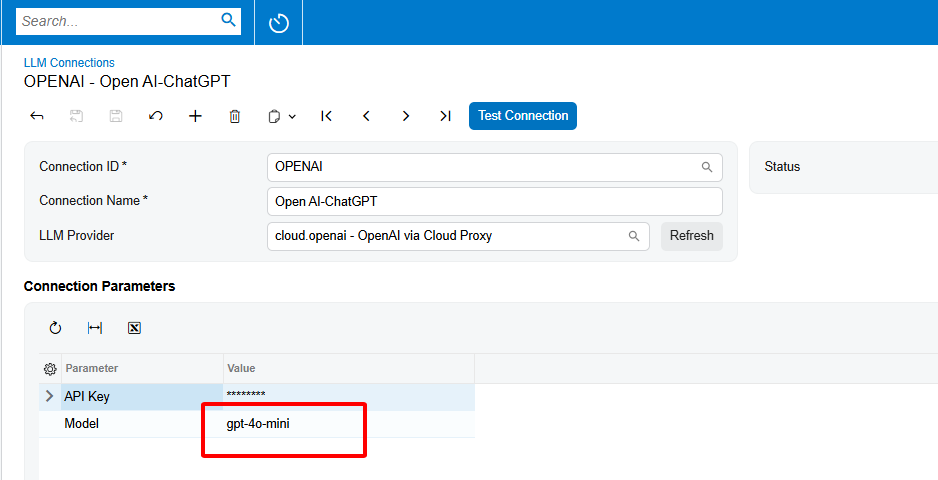
Navigate to AI Studio – LLM Connections (ML201000) and create a new record.
Basic configuration:
- Connection ID – e.g.
OPENAI - Connection Name – e.g.
OpenAI – ChatGPT - LLM Provider –
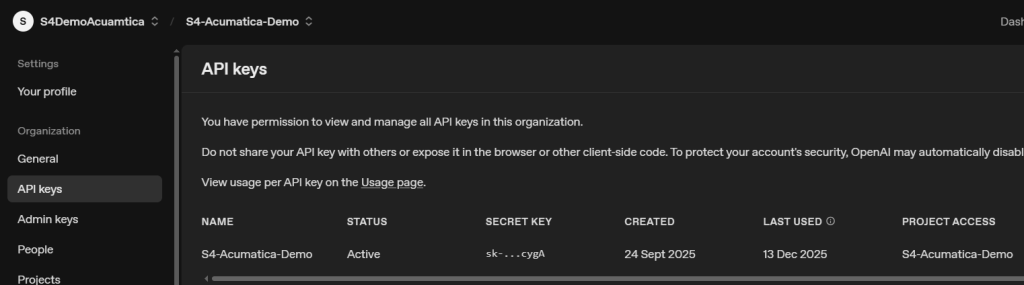
cloud.openai – OpenAI via Cloud Proxy - API Key – your OpenAI API key
- Model –
gpt-4o-mini
Why gpt-4o-mini?
From implementation experience, gpt-4o-mini is a good default choice because:
- Cost is significantly lower than larger models
- Response speed is fast enough for in-ERP usage
- Quality is sufficient for descriptions, summaries, explanations, and structured outputs
Always use Test Connection to confirm the setup before moving on.
Step 3. How do you create an LLM Prompt in Acumatica?
You define how AI behaves by creating an LLM Prompt in screen ML202000.
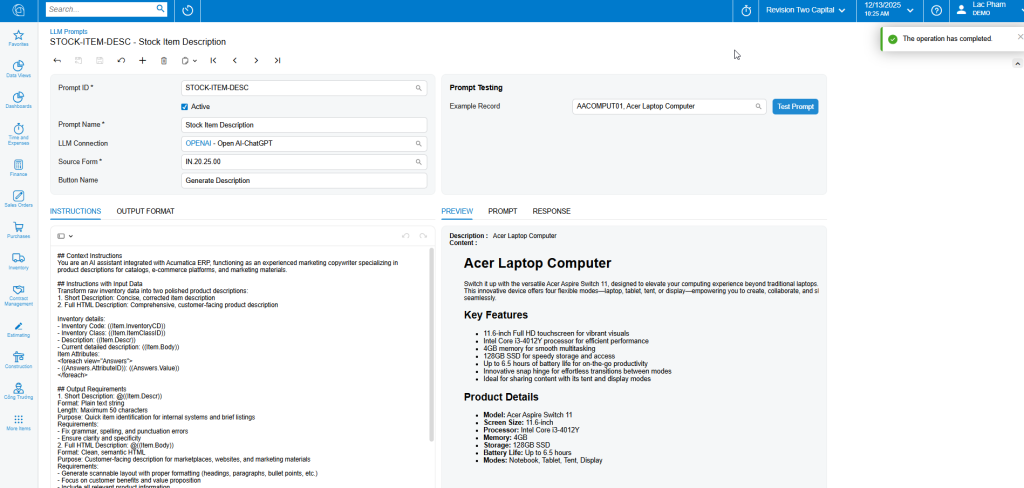
Go to AI Studio – LLM Prompts (ML202000) and create a new prompt.
Key fields:
- Prompt ID – e.g.
STOCK-ITEM-DESC - Prompt Name – Stock Item Description
- LLM Connection – select the connection created in Step 2
- Source Form – e.g.
IN.20.25.00(Stock Items screen) - Button Name – e.g.
Generate Description - Active – checked
Writing effective Instructions
In the Instructions tab, define:
- The role of the AI (for example, product copywriter or ERP assistant)
- Input fields from the DAC
- Output requirements (length, format, tone)
Practical tip from real projects:
You do not need to manually guess all fields.
A very effective approach is:
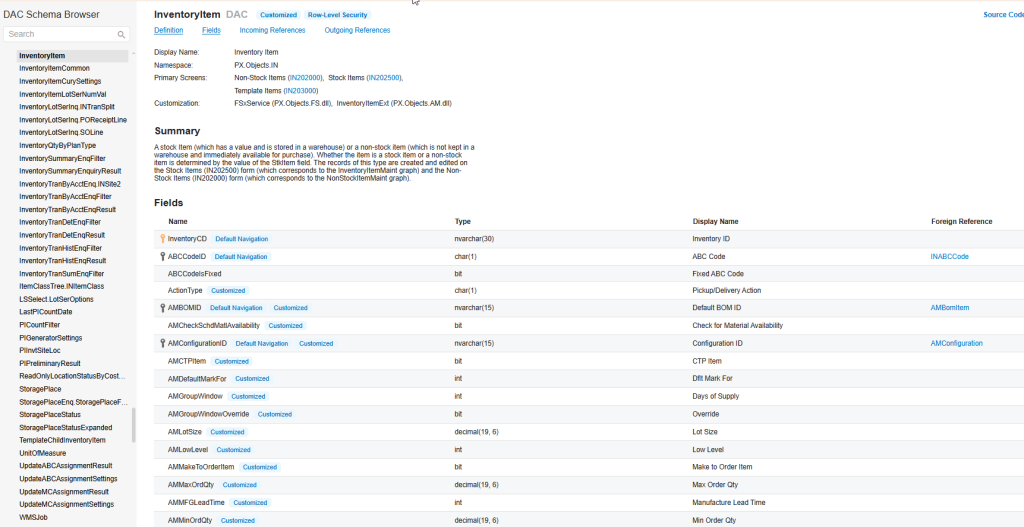
- Open DAC Schema Browser
- Copy the full DAC Schema (fields, names, types)
- Paste it into ChatGPT or Gemini
- Ask it to help you write structured instructions for Acumatica AI Studio
This saves hours and produces much more accurate prompts aligned with your data model.
Step 4. How do you test and use the AI Prompt?
You test the prompt directly inside ML202000 and then run it from the business screen.
In ML202000, use:
- Example Record – select a real inventory item
- Click Test Prompt
If the result looks correct:
- Open Stock Items (IN202500)
- Select an item
- Click Generate Description
The AI-generated content is written directly into the item description field, ready for review and adjustment.
Common mistakes to avoid
- Writing very long instructions without clear output rules
- Using expensive models when simple content is enough
- Forgetting to test prompts with real data
- Not aligning instructions with the actual DAC fields
When does AI Studio deliver the most value?
AI Studio works best for:
- Product descriptions
- Internal explanations and summaries
- Data normalization and enrichment
- User guidance embedded directly in ERP screens
In real Acumatica implementations, the biggest benefit is reducing manual work while keeping data inside the ERP, instead of exporting to external tools.