How to Configure Self-Service Portal in Acumatica Cloud ERP
How to Configure Self-Service Portal in Acumatica Cloud ERP
The Self-Service Portal in Acumatica Cloud ERP allows customers or partners to access ERP data through a dedicated web portal. Users can view financial documents, submit support cases, place orders, and update their account information.

The portal runs as a separate web instance but uses the same database as the main ERP system, ensuring that all information is synchronized in real time.
In real Acumatica implementations, the Self-Service Portal is typically used for:
- Customer support portals
- B2B ordering portals
- Customer financial portals
What is the Self-Service Portal in Acumatica?
The Self-Service Portal is a web interface that allows customers or partners to interact directly with Acumatica ERP.
Typical portal capabilities include:
- Viewing financial documents such as invoices or statements
- Placing B2B orders
- Creating and tracking support cases
- Updating account information
- Tracking order status
Technically, the portal runs as a separate IIS instance, but it connects to the same ERP database. This architecture allows transactions created in the portal to immediately appear inside the ERP system.
What Steps Are Required to Configure the Self-Service Portal?
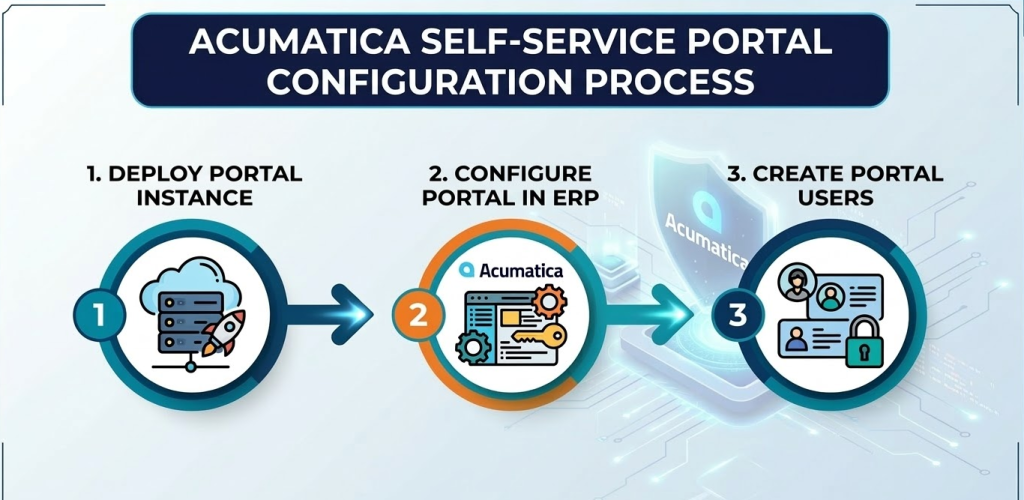
The configuration process usually consists of three main steps:
- Deploy the Self-Service Portal instance
- Configure the portal inside the ERP system
- Create portal users and assign access roles
These three steps ensure that the portal can securely access ERP data and operate correctly.
Step 1 – Deploy the Self-Service Portal Instance
The first step is deploying a dedicated portal instance on the server.
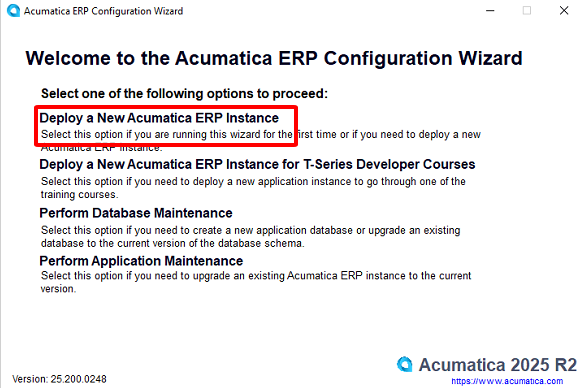
1. Open the Configuration Wizard
On the server where Acumatica is installed, launch:
Acumatica ERP Configuration Wizard
Then select:
Deploy a New Acumatica ERP Instance
This wizard will create the application structure needed for the portal.
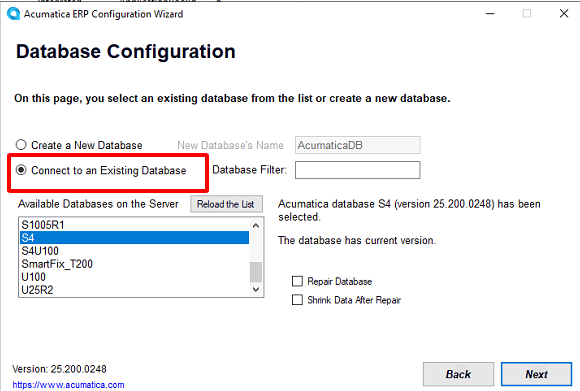
2. Connect to the ERP Database
In the Database Configuration screen, choose:
Connect to an Existing Database
Select the existing ERP database.
Using the same database is critical because the portal must access the same transactional data as the ERP system.
3. Configure the Portal Instance Type
In the Instance Configuration screen:
- Enter the Instance Name
- Select Create Self-Service Portal
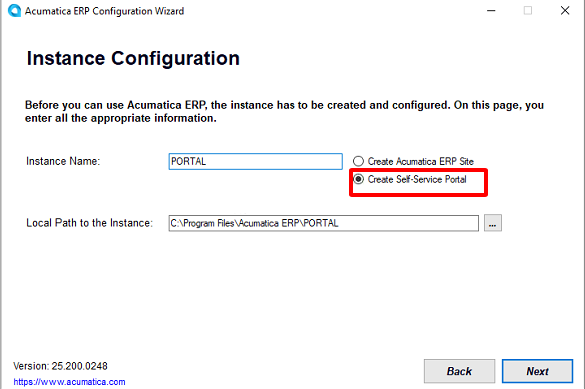
After completing the wizard, the system automatically creates:
- An IIS application for the portal
- A portal directory on the server
Example IIS structure:
Default Web Site
 ├─ ERP (main ERP instance)
 └─ PORTAL (Self-Service Portal)
The portal URL usually follows this format:
https://server-name/portal
4. Activate the Portal License
The Self-Service Portal requires a separate license.
Go to the screen:
Activate License (SM201510)
Then upload the license file or enter the license key.
The portal license is separate from the main ERP license.
In most cases, the portal subscription cost is approximately $4,000–$5,000 per year depending on the licensing model.
Step 2 – Configure the Portal in Acumatica ERP
After deploying the portal instance, the next step is configuring the portal inside the main ERP system.
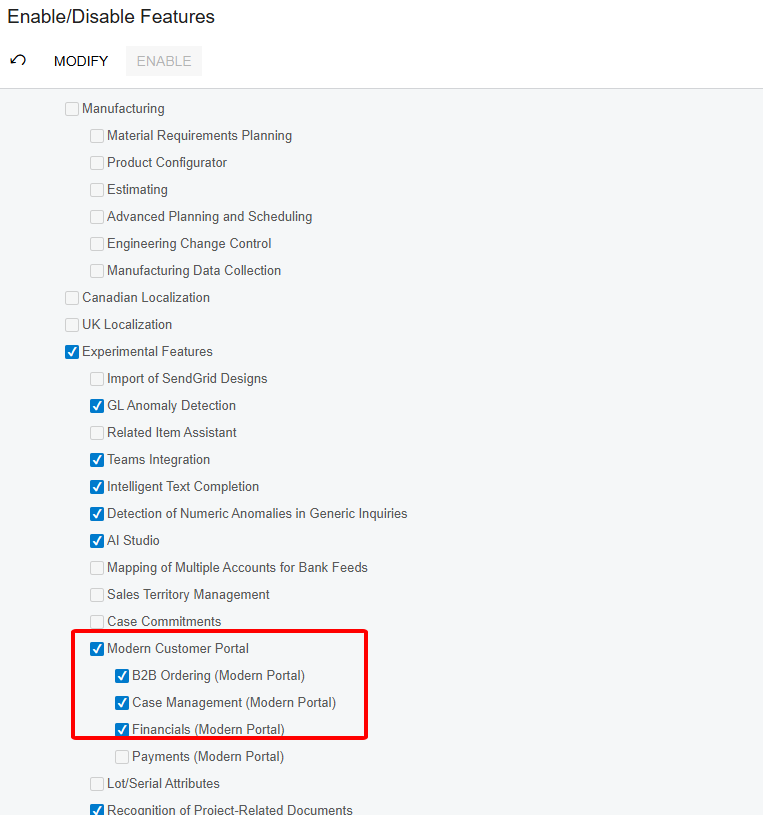
1. Enable Portal Features
Open the screen:
Enable/Disable Features (CS100000)
Enable the required features:
- Modern Customer Portal
- Case Management (Modern Portal)
- Financials (Modern Portal) – optional
- B2B Ordering (Modern Portal) – optional
- Payments (Modern Portal) – optional
These features determine which functions customers can access in the portal.
2. Configure the Portal URL
Open the screen:
Portals (SP701000)
Create a new portal and define:
- Portal Name
- Portal URL
Example configuration:
Portal URL = https://server/portal
This URL must match the portal instance that was deployed earlier.
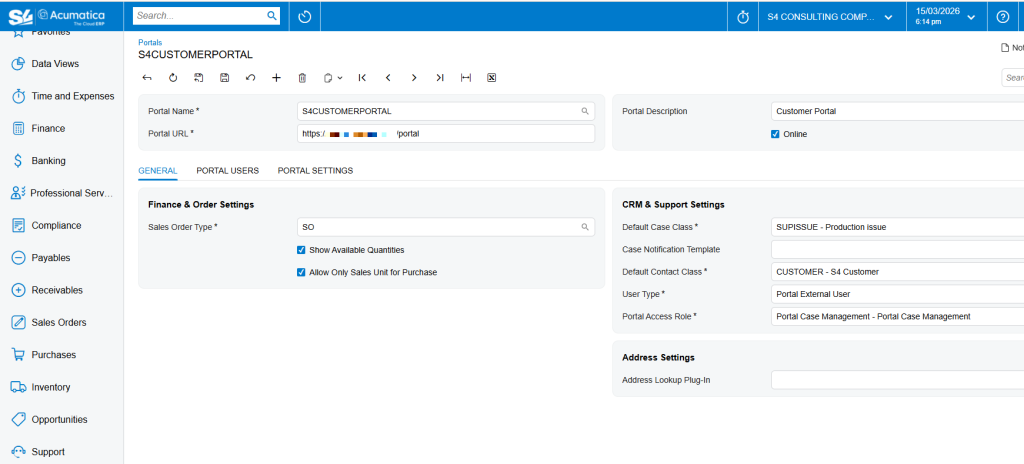
3. Configure CRM and Support Settings
Next, configure the CRM parameters used by the portal.
Typical configuration values include:
- Default Case Class
- Default Contact Class
- User Type
- Portal Access Role
Example configuration:
Default Case Class = SUPISSUE
Default Contact Class = CUSTOMER
User Type = Portal External User
Portal Access Role = Portal Case Management
If the portal is used for sales or financial access, additional parameters can be configured:
- Sales Order Type
- Show Available Quantities
Step 3 – Create Portal Users
After the portal configuration is complete, the next step is creating users who can access the portal.
1. Create a Contact
Open the screen:
Contacts (CR302000)
Create a contact with the following information:
- Contact Name
- Business Account
A key requirement is that the contact must be linked to a Customer (Business Account).
The data relationship in Acumatica is:
Customer
 → Contact
 → Portal User
2. Create the User Account
In the User Info tab, configure:
- User Type = Portal External User
- Login = Email or Username
Then click:
Reset Password
This generates login credentials for the portal user.
3. Assign Portal Roles
Assign the appropriate roles in the Assigned Roles section.
Common portal roles include:
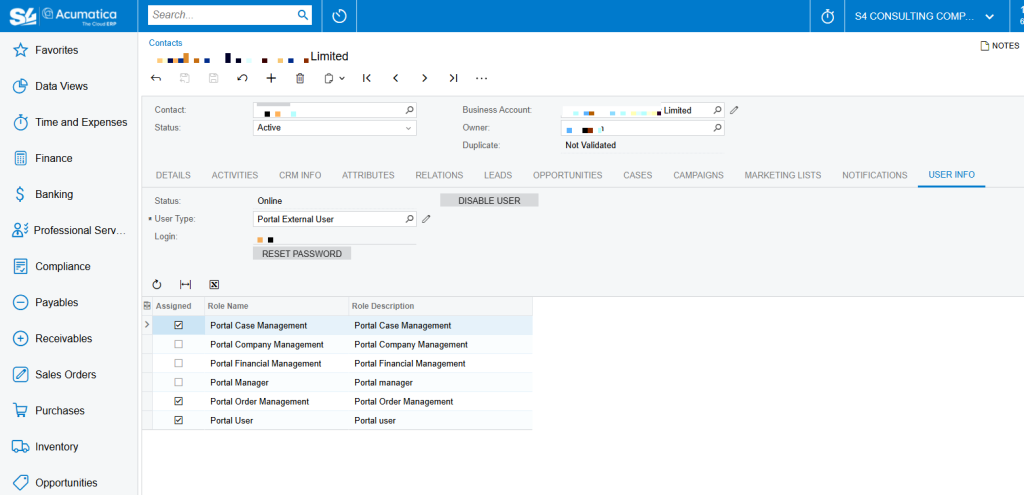
| Role | Function |
|---|---|
| Portal User | Basic portal access |
| Portal Case Management | Create and track support cases |
| Portal Order Management | Place orders |
| Portal Financial Management | View financial documents |
| Portal Company Management | Manage users within the customer organization |
How to Test the Portal
After configuration is complete, open the portal URL:
https://server/portal
Log in using the portal user account.
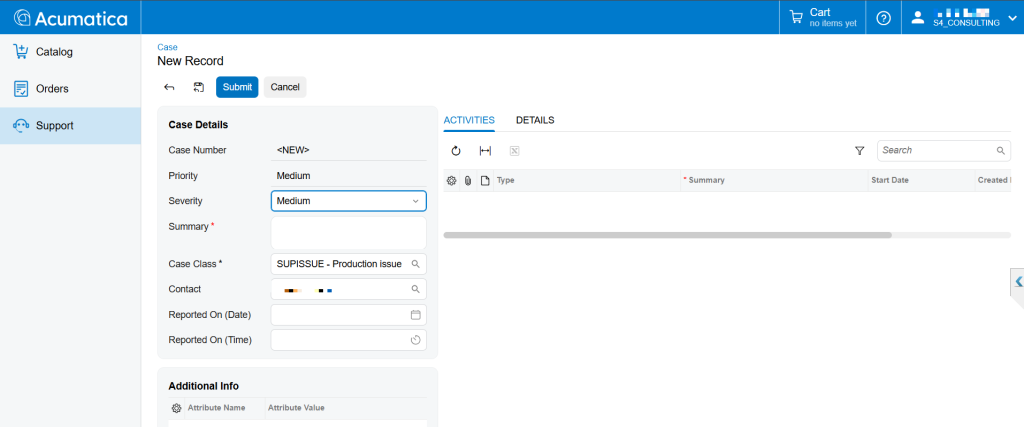
Example test scenario:
- Navigate to Support → New Case
- Create a support request
The case will immediately appear in Acumatica ERP at:
Cases (CR306000)
This confirms that the portal is successfully connected to the ERP system.
When Should Companies Deploy the Self-Service Portal?
In real Acumatica implementations, companies usually deploy the portal when they want to:
- Reduce the volume of support requests via email
- Allow customers to track support tickets directly
- Build a B2B ordering portal
- Provide customers with a financial document portal
The Self-Service Portal enables customers to serve themselves while keeping all data centralized in the ERP system.
Conclusion
Configuring the Self-Service Portal in Acumatica involves three main steps:
- Deploy the portal instance
- Configure the portal inside the ERP system
- Create portal users and assign roles
Once deployed, customers can:
- Log in to the portal
- Create support cases
- View financial documents
- Place orders
- Update account information
All through a dedicated web portal connected directly to Acumatica ERP.
FAQ – Self-Service Portal in Acumatica
Does the Self-Service Portal use the same database as the ERP system?
Yes. The portal runs on a separate web instance but connects to the same ERP database. This allows all data to be synchronized in real time.
Does the portal require a separate license?
Yes. The Self-Service Portal requires its own license, which is separate from the main ERP license.
Can customers create support tickets from the portal?
Yes. Customers can submit and track support cases through the portal. The cases automatically appear in the CRM module of Acumatica.
Can the portal be used for B2B ordering?
Yes. With the B2B Ordering (Modern Portal) feature enabled, customers can place orders and track order status directly from the portal.
How to Configure AI Studio in Acumatica – Step-by-Step Guide