How to Customize the Acumatica Login Screen Background
How to Customize the Acumatica Login Screen Background
Acumatica Cloud ERP allows businesses to personalize their login screen to reflect their brand identity. Whether you want to showcase your company logo, brand colors, or a specific theme, customizing the login screen enhances the user experience and strengthens brand presence. In this guide, we will walk you through the step-by-step process of changing the Acumatica login screen background.
1. Prerequisites
Before you begin, ensure you have the following:
✔ Administrator access to the Acumatica server (IIS Web Server). ✔ High-quality background images with dimensions 1500x1000px in JPG format. ✔ Access to the file directory where login screen images are stored:
C:\Program Files\Acumatica ERP\{instance_name}\Icons(Replace {instance_name} with your specific Acumatica instance name.)
2. Steps to Change the Acumatica Login Background
Step 1: Prepare Your Images
- Select high-quality images that align with your brand identity.
- Ensure the images are 1500x1000px and saved in JPG format.
- Name the images following this convention:
login_bg1.jpglogin_bg2.jpglogin_bg3.jpg, etc.
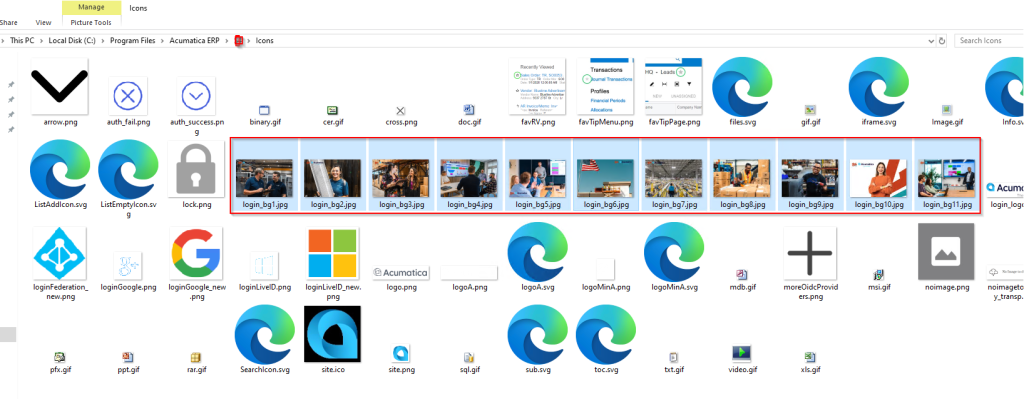
Step 2: Access the Acumatica Login Screen Image Folder
- Log in to your Acumatica server.
- Navigate to the directory where login screen images are stored:
C:\Program Files\Acumatica ERP\{instance_name}\Icons
Step 3: Replace the Default Acumatica Login Background Images
- Backup the existing images (optional but recommended) in case you need to restore them later.
- Copy your new background images into the folder and overwrite the old ones.
- Ensure that the filenames match the existing ones (e.g.,
login_bg1.jpg,login_bg2.jpg).
Step 4: Apply the Changes
- Clear browser cache and refresh the login page (
Ctrl + F5). - Press F5 to cycle through the new background images.
- If the new images do not appear, restart IIS services by running the following command in Command Prompt (Administrator mode): iisreset
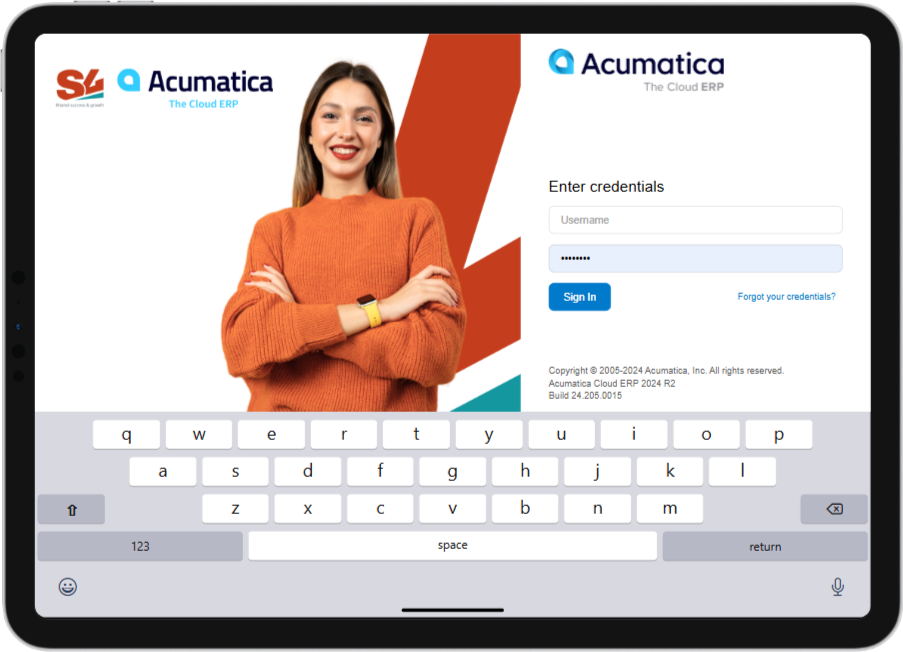
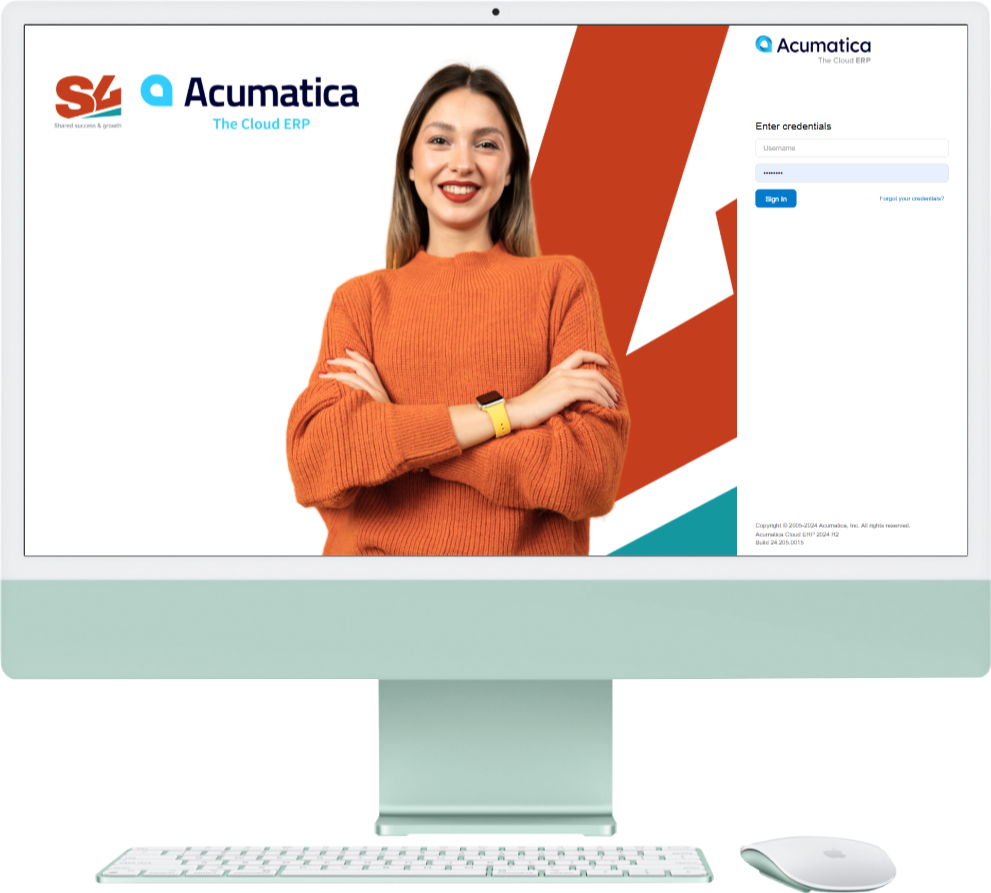
3. Final Outcome
Once you have successfully replaced the images, the login screen will display your new customized background. Below is an example of a customized Acumatica login screen:
4. Important Considerations
⚠ Use only JPG format to ensure compatibility with Acumatica. ⚠ Maintain the recommended size (1500x1000px) to prevent distortion. ⚠ Always back up original files before making changes.
5. Conclusion
By following these simple steps, you can personalize the Acumatica login screen to better align with your brand identity. If you need further customization, such as changing colors or logos, consider exploring Acumatica’s White Labeling options.
🎯 Have you customized your Acumatica login screen yet? Let us know in the comments!
📌 Stay tuned for more Acumatica ERP customization tips!
#Acumatica #ERP #AcumaticaLogin #Branding #Customization #CloudERP #BusinessTech
Source: Acumatica